Quick answer
Neutral oak look luxury vinyl plank, or LVP, is a useful starting point for brass, nickel or a restrained mix of both. Choose the floor against the finishes you are keeping, then compare actual hardware. For late 2026 winter planning, these are design recommendations, not measured Austin sales trends.
1. Let the fixed finishes narrow the plank
Start with the countertop, cabinet doors and appliances that will stay. Hardware is usually a smaller commitment than replacing a sound floor. Do not choose an orange leaning plank simply because a brass pull looks good beside one corner of the sample.
Try a pale neutral oak look, a beige brown and a muted medium brown against those fixed surfaces. Look at the background color between the grain marks. That is often where an unwanted pink, yellow or gray cast becomes easiest to spot. Our Austin LVP flooring page is a starting point for discussing the material, while the final color belongs in your kitchen.
2. Use brass without doubling every golden tone
Brass is not one color or one level of shine. Schlage distinguishes Satin Brass from the higher shine of Bright Brass.1 An aged brass pendant and a bright yellow pull should not be assumed to match because both carry the brass name.
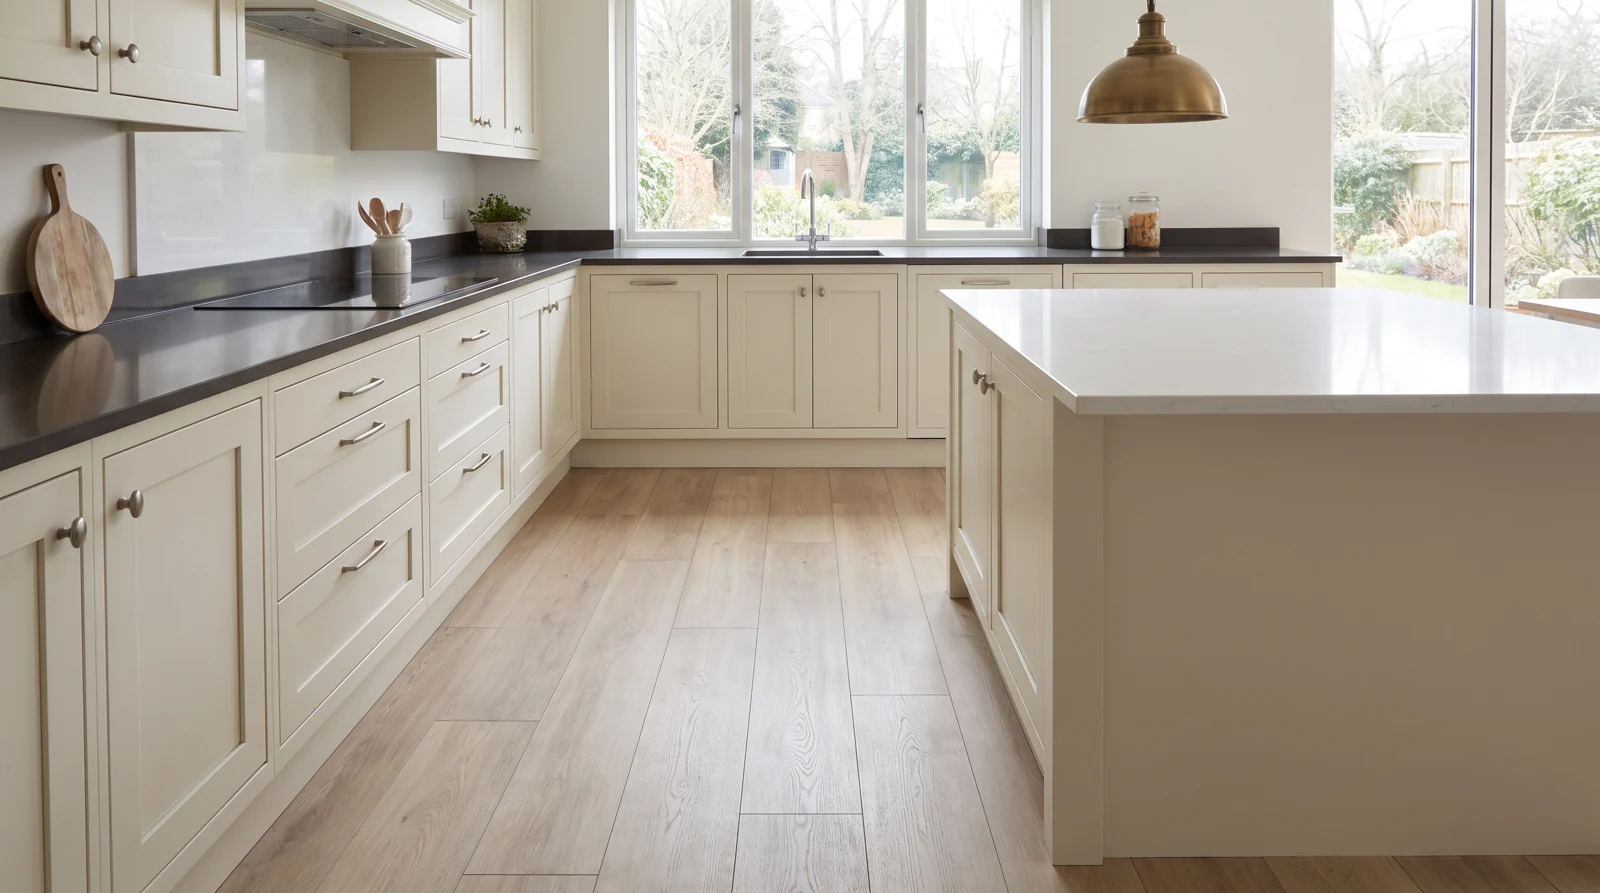
With amber leaning planks, try a softer brass finish before committing to bright gold throughout. Cream cabinetry can provide separation, but assess the whole arrangement rather than declaring warm tones automatically compatible.
For an older Crestview kitchen with sound cabinets, replacing one pull temporarily is a useful test. If the floor, cabinets and hardware all read strongly golden together, try a less yellow plank or let nickel handle the repeated cabinet hardware. You do not have to remove every existing brass detail.
3. Give nickel its own sample comparison
Nickel does not require a gray floor. As a design starting point, brushed nickel can sit comfortably beside neutral beige oak looks or muted brown planks. It can also provide contrast when the cabinets are warm.
Do not treat polished nickel, brushed nickel, chrome and stainless steel as interchangeable silver finishes. Delta describes its polished nickel kitchen finish as having subtle gold tones and reflecting shadows from the room.2 That description is a reason to inspect the actual finish, not a promise that every nickel product will look identical.
Hold the proposed pull beside the faucet and appliance handle before ordering the full set. A deliberate difference can work. A near match that bothers you on the sample will not improve because you bought more of it.
4. Assign each metal a clear job
For a restrained mixed scheme, choose one finish for the repeated hardware and another for a focal piece. Brushed nickel cabinet pulls with an aged brass pendant are a practical example. Keep the shapes related so the metal difference does not also become a clash of styles.
Delta's design guidance recommends similar style families and distinct zones when mixing metals.3 That supports intentional coordination, not a mandatory formula or a rule that every visible object must match.
For this decision, Good means retaining serviceable nickel hardware and choosing a compatible plank. Better means testing coordinated replacement pulls. Best means approving the floor, pulls, faucet and lighting together. These describe decision scope, not product quality or price tiers. More brass is not automatically a better result.
5. Approve a realistic material mockup
Build one arrangement that resembles what you will actually see from the kitchen doorway. A Rosedale bungalow refresh and a Mueller kitchen update both benefit from checking the connected room, not just the island close up.
- Lay several proposed planks flat beside the cabinet toe kick. Include different grain faces if available.
- Put an actual pull against a door or drawer front. Hold the second metal where its fixture will be seen.
- Add the countertop and backsplash samples in their intended positions, rather than stacking everything flat.
- Review the arrangement with your normal kitchen lights and daylight. Use photographs as reminders, not as the final color authority.
Write down which combination you approved. If one sample remains questionable, replace that sample before changing the whole palette.
6. Put the finish choices into the installation scope
Confirm hardware hole spacing before ordering replacements. If new pulls expose old holes, resolve cabinet patching and painting before the floor becomes the work surface. Agree on floor protection for any remaining fixture installation.
A hardware refresh does not usually alter the flooring sequence, but cabinet or island replacement can. MSI's installation and warranty document restricts fixed cabinetry and islands on floating floors and requires expansion space around fixed objects.4 Follow the instructions for the exact product rather than transferring one collection's measurements to every plank. Read our kitchen island planning guide if the island is changing.
Ask the quote to identify demolition, moisture evaluation, floor preparation, appliance clearances, transitions and trim work. Our guide to comparing LVP installation quotes helps organize that discussion.
Bring your approved hardware and material samples to the conversation with CC Floors Austin. Contact Dan at 512-769-2292 to discuss the project. Samples, supply, scheduling and installed price require confirmation.
Related winter reading
- A Winter LVP Brand Shortlist Built Around Your Room
- Low Contrast LVP Grain for Open Austin Floor Plans in Winter 2026
- Cognac Brown LVP with Clay Paint for Winter 2026
Frequently asked questions
What LVP color goes with brass cabinet hardware?
Start with neutral oak looks or muted beige brown planks. Compare the actual brass finish against the cabinets and countertop before adding another strongly yellow surface.
Can I use brushed nickel with a warm wood look floor?
Yes. Warm planks do not require brass. Test brushed nickel with the faucet and appliances so the repeated hardware feels intentional rather than nearly matched.
Can brass lighting and nickel cabinet pulls work together?
Yes. Give each finish a defined role, such as brass lighting and nickel pulls, and keep the shapes compatible. A quiet plank color can help keep that combination restrained.
Should I replace hardware before installing kitchen LVP?
Decide the hardware first, especially if cabinet holes need repair or painting. Coordinate the final installation and floor protection with the trades; cabinet or island replacement needs a separate flooring sequence discussion.
Sources and resources
- Schlage guide to choosing hardware finishes
- Delta polished nickel kitchen finish description
- Delta guidance on intentional mixed metal finishes
- MSI flooring installation warranty and care document
Discuss your winter project
Thank you for considering CC Floors Austin. Request a project consultation, call 512-769-2292, text 713-444-4625, or email dan@austinflooringco.com. Confirm measurements, material selection, preparation and scheduling in a written scope before work begins.